Learn to setup a development environment on a PC to support the development and testing of PHP and MySQL projects.
XAMPP stands for Cross-platform, Apache, MySQL, PHP and Perl. Within a few mouse clicks, you can install Apache, MySQL, PHP, and phpMyAdmin on the PC. XAMPP was created primarily as a PHP development environment for Windows computer.
This walk-through will use the XAMPP all-in-one package.
Click the phpinfo() link under the Php section of the menu on the main admin page. You should see a page showing PHP configuration information below. (Figure 4)

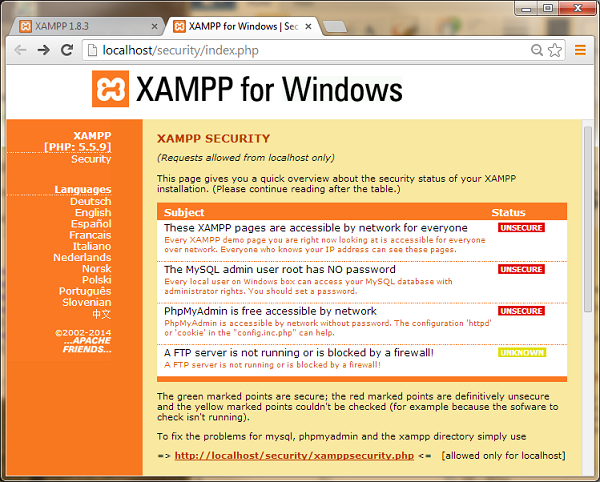
You have been able to launch the above pages without being prompted
for logging in. Your development environment is not secured. Everyone
can access your XAMPP pages through the network.
Click the Security link under the Welcome section of the menu on the main admin page. You should see the XAMPP SECURITY page below. (Figure 6)
Introduction
The development environment is the location where you write and test your web applications before uploading them to the staging environment and then to the production environment. The most common location for your development environment is your own computer. This walk-through shows you how to set up a development environment on a PC for development of web applications using PHP, MySQL, and Apache.
Software
The target development environment will consist of the following five software components:- Web Server - Apache
- Database Server - MySQL
- Web Programming Language - PHP
- Database Management Tool - phpMyAdmin
- Integrated Development Environment (IDE) - Net Beans.
Install from an All-in-One Package
Installing the software from an all-in-one package is faster and easier. For a Windows computer, there is a free package called XAMPP that you can download from Apache Friends.XAMPP stands for Cross-platform, Apache, MySQL, PHP and Perl. Within a few mouse clicks, you can install Apache, MySQL, PHP, and phpMyAdmin on the PC. XAMPP was created primarily as a PHP development environment for Windows computer.
Install each Software Package Separately
If you are braver, you can also download and install Apache, MySQL, PHP, and phpMyAdmin software separately on your PC. They are downloadable from their respective websites:This walk-through will use the XAMPP all-in-one package.
Install XAMPP
Download the XAMPP for Windows Installer. Double-click the downloaded exe file to start the installation. When prompted, just leave every option to default. By default, the installer will extracts all the necessary files to a new folder at c:\xampp.
After successful installation, you should find an XAMPP icon on your desktop, double-click it to launch the XAMPP Control Panel as shown in Figure 1. Alternatively, you can locate c:\xampp-control.exe, the control panel program, and drag a shortcut to the desktop.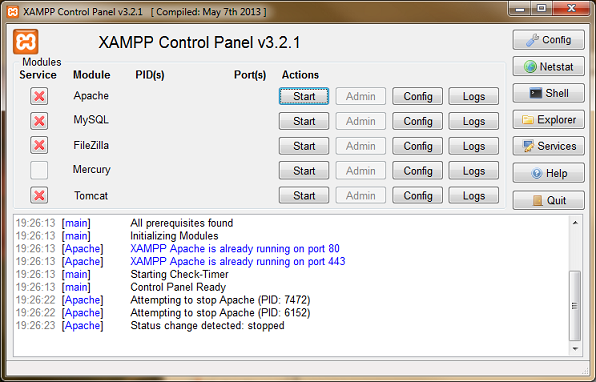
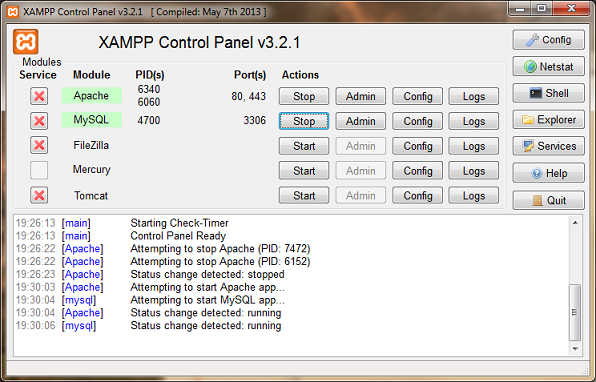
On the XAMPP Control Panel, click the Start buttons for Apache and MySQL. Messages that they have started successfully are displayed, and the labels on their respective Start buttons changes to Stop. (Figure 2)
Click the Admin button for the Apache server, or alternatively launch a browser and enter http://localhost/ into the address bar. If everything has been correctly set up, you should see the following main admin page on the browser. (Figure 3)
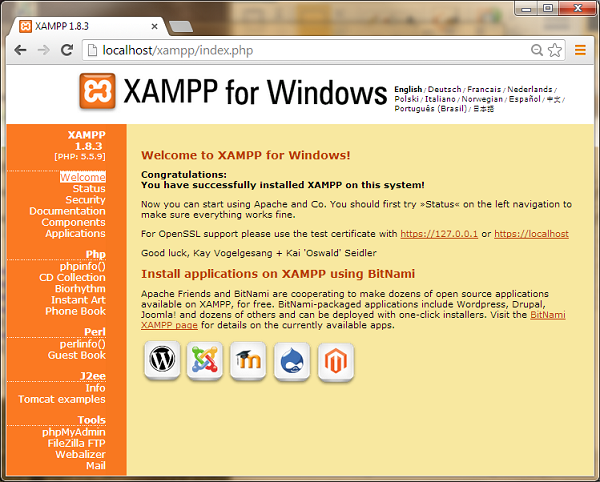
The menu on the left of the main admin page gives you web-based access to the various components of XAMPP.
Click the phpinfo() link under the Php section of the menu on the main admin page. You should see a page showing PHP configuration information below. (Figure 4)
Click the phpMyAdmin link under the Tools section of the menu on the main admin page, or type http://localhost/phpmyadmin on a browser address bar. This will launch the phpMyAdmin page for managing the MySQL database server. (Figure 5) You can also launch the phpMyAdmin through the Admin button beside MySQL on the XAMPP Control Panel.

Click the Security link under the Welcome section of the menu on the main admin page. You should see the XAMPP SECURITY page below. (Figure 6)


Comments
Post a Comment